
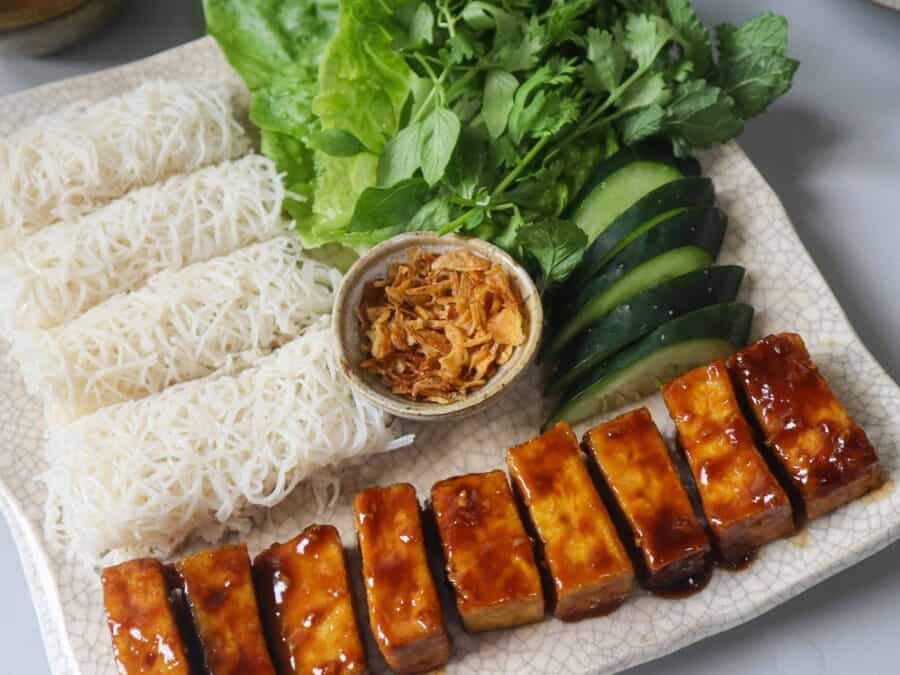
IT’S HERE! Finally sharing the recipe for this Easy Vegan Kimchi, along with 2 other banchan (korean side dishes) that you can make!

THIS VEGAN KIMCHI
This easy vegan kimchi is inspired by mat kimchi 맛김치, that's usually made by pre-cutting the cabbage first before turning it into kimchi to ferment. This is however not the traditional way to make kimchi. Mat kimchi can also be eaten fresh, right after making and doesn't ferment as well as traditionally made kimchi where the cabbage is kept whole (in halves) and wrapped/rolled as tight as possible to leave ferment.
See my kimchi and banchan recipe video below!
I received a lot of messages about how I make my vegan kimchi, and I’m so happy to finally share the recipe with you, along with tips on preparation, fermentation, and storage!
Making the Vegan Kimchi 김치
I start of (of course) with a head of napa cabbage or wombok that I slice into small pieces.


I left the cabbage to soak in water with salt. Afterwards I rinsed it to wash off the salt and any dirt.

THE PASTE: GOCHUGARU VS GOCHUJANG
For the base of the paste, I use glutinous rice flour. But you can also use regular all-purpose flour.

GOCHUJANG VS GOCHUGARU FOR VEGAN KIMCHI
I made vegan kimchi using both gochugaru or korean chili pepper powder, which is what's used in traditional kimchi and gochujang or chili pepper paste, which might be more accessible for other people!

GOCHUGARU
I get big packs of gochugaru because I go through them so fast, especially when I'm making kimchi or some soup. Gochugaru is very bright red and is actually has a very mild spice compared to other chiles and has a sweet note.
Here's what the powder looks like:

It’s a bright red colour that really gives the kimchi that distinct bright red hue. Get gochugaru here.
GOCHUJANG
As for gochujang, I get mine in tubs like this below. It lasts months refrigerated!

It’s a very thick paste and most brands are already salted. Get gochujang here.
THE DIFFERENCES
The most noticeable difference between using powder and paste, is definitely the colour.

The kimchi made using gochujang (paste) also has an earthier and more umami flavour because of the gochujang, while the one made with gochugaru (powder) is lighter and in a way more refreshing.
My personal preference
I personally prefer the one made with gochugaru (powder) especially if I were to enjoy the kimchi as is. But if cooking with the kimchi, such as making fried rice or kimchi pancakes, then gochujang would be a good option too.
Mixing everything together and placing the kimchi in bottles to ferment:


Bottle it up! Make sure not to fill the jars and leave at least 1/4 empty because it'll expand during fermentation.

This Vegan Kimchi is packed full of flavour and also of course, good gut bacteria from the fermentation process.
I’ll share more tips and tricks on kimchi-making and fermentation below!
FAQs on Kimchi:
Here's a rundown:
- Gochugaru vs. Gochujang – using gochugaru or Korean hot pepper powder is the best and is what is used to make traditional kimchi. I used gochujang, which is the hot pepper powder in paste form and it did not yield the exact same flavours and also had a more orange and slightly brown-ish colour.
- Water – if using gochujang (paste), lessen water to 1/4 cup instead of 1/2 cup.
- Flour – glutinous rice flour is what’s traditionally used. If you don’t have access to it, feel free to use all-purpose flour or regular rice flour, for a gluten-free alternative.
- Salt – seasoning with salt is sometimes unnecessary since the cabbage is soaked in salt water and absorbs the salt over time. It would be best to taste the kimchi first before seasoning with salt. You can always add the salt even a few days after, when flavours start to infuse and strengthen.
- Fermentation and Storage – Fermentation gives kimchi the sour taste. As it continues to ferment, the sour taste and smell strengthens, so does the flavour of the kimchi.
- Top layer of the bottle of kimchi is discoloured/pale orange – the top layer of kimchi that’s not completely submerged in the liquid during fermentation can turn into a pale orange and look dry. Don’t worry as this is normal from being exposed and not submerged in the liquid. You can just give its good mix after fermentation and it’ll be good!
- Too Salty? – if your kimchi becomes too salty after fermenting, you can add more vegetables like sliced carrots, leeks, radish to ‘absorb’ the saltiness. Leave it to sit in the refrigerator and try it again after a few days.

More Fermentation Tips
- Placing in containers – do not fill your bottles or containers to the brim when kimchi is not yet fermented because they’ll expand! Best to fill at most 3/4 of the container.
- Bubbles and Air Pockets – you’ll notice that the kimchi will expand and form bubbles during fermentation. This is a good sign!
- After fermentation – after the kimchi has fermented and you’re happy with how sour it is, place it in the refrigerator to prevent it from going bad. Make sure to mix the kimchi well in its juices so they’re all coated. Compress the kimchi again and pack it tight before sealing the container!
- Kimchi juice – okay so kimchi juice is perfect to use in certain recipes like fried rice and kimchi pancake, because it definitely adds to the colour and the taste. But what if your kimchi doesn’t have too much liquid? I find that squeezing the cabbage too much during the preparation process takes out a lot of its liquid so even after fermentation, it no longer releases so much water to create a lot of juice. So if you want juicy kimchi, you can just wash the cabbage well to remove the salt and not squeeze them too dry before mixing in the paste.
- Storing kimchi – the longest I’ve kept my kimchi in the fridge is 6 weeks. The flavours do get stronger as it sits in the juices longer, so it’s important to take note of that, especially if your kimchi is a bit salty at the start..
Here's how I love to enjoy kimchi (tap on the titles for the recipe links!)
Kimchi Pancakes (Kimchi-Jeon)

Korean Mixed Rice (Bibimbap)

Kimchi Fried Rice

OTHER BANCHAN (Korean Side Dishes)
And of course, you can enjoy kimchi as is or as some sides to your meal!
The two other banchan, or Korean side dishes, I made are (1) beansprout salad (kongnamul) and (2) spinach salad (sigumchinamul).

BEANSPROUT SALAD
I really love kongnamul (mung bean sprout salad) or sookjunamul (soybean sprout salad) and go through a huge container of this so fast.
I can eat it as is or with some rice. love making a big batch so I can store it in the fridge for 2 to 3 days and just get a small batch to enjoy for each meal.

Are you looking for more delicious, vegan Asian recipes?
If you crave vegan-friendly versions of classic Asian dishes, this cookbook is packed with Southeast and East Asian dishes inspired by those I grew up enjoying at home and those I’ve tried from my travels. From iconic Thai dishes to piping-hot Japanese fare and everything in between, the recipes in this will take your palate on a delicious food trip across Asia, and hopefully keep you coming back for more!

Find out more about my reforestation initiatives here.
OTHER KOREAN RECIPES YOU MIGHT ENJOY:
- "Beef" Bulgogi Bowls
- Vegan Kimchi
- Korean Beansprout Salad
- Bibim Guksu (Korean Mixed Noodles)
- Sundubu Jjigae (Korean Soft Tofu Stew)
- Kimchi Noodle Soup with Dumplings
- Kimchi Noodle Stir-Fry
- Jjajangmyeon
- Kimchi Pancakes or Kimchi Jeon
- Pajeon (Korean Scallion Pancakes)
- Yachaejeon (Korean Vegetable Pancakes)

Easy Vegan Kimchi 맛김치
Ingredients
KIMCHI
- 1.5 lb napa cabbage or wombok
- 1/4 cup sea salt I used coarse salt
- 1/2 cup room temp. water
Kimchi Paste
- 1/2 cup water see notes if using gochujang*
- 4 tsp glutinous rice flour or all-purpose flour (see notes)
- 1 tbsp cane sugar
- 5 cloves garlic
- 1 small knob ginger
- 1/3 cup gochugaru (korean chili powder) or gochujang, see notes
- 1 white onion , quartered
For Mixing the Kimchi
- 1 cup thinly sliced green onion or scallions
- 1/2 medium carrot and/or radish , thinly julienned
- 1-2 tsp salt optional to taste* (see notes)
Instructions
Preparing the Cabbage
- Slice the napa cabbage into halves, and then quarters. Slice out the tough cores.

- Slice into 2-inch thick strips. Place the sliced cabbage into a large bowl.
- Sprinkle the 1/4 cup salt and pour 1/2 cup water. Mix the cabbage to evenly coat with the salt mixture.
- Leave the cabbage to sit for at least 1.5 hours, mixing every 30 minutes, to evenly coat in the salt mix.
- After leaving to sit in the salt mixture, run the cabbage through running water the remove excess salt any any dirt. Wash 2 to 3 times. Drain and then squeeze out the liquid. Note that if you want lots of juice in your kimchi after fermentation, squeeze out to drain the liquid out but not too much! See more fermentation tips below.
- Place the cabbage back in the large bowl.


Preparing the Kimchi Paste
- Heat a small sauce pan over medium low heat. Add in the water and then mix in the flour. Increase to medium heat.

- Stir continuously until it has turned into a very thick paste. Turn off heat and leave to cool for a few minutes.
- Place the paste, sugar, garlic, ginger, chili powder, and onion in a blender or food processor. Blend or process until well incorporated.


Mixing the Kimchi
- Place the carrot, radish (if using) and sliced green onions with the drained cabbage. Pour the chili paste into the vegetables and mix until well incorporated. Add in salt, or to taste, if needed. Mix well.
- Divide the kimchi into jars or air-tight containers. Tightly pack the kimchi by pressing down with a spoon. Ensure that you do not fill the bottles to the brim, as kimchi will expand as it ferments. Best would be to only fill bottles 3/4 full.
- You can also enjoy the kimchi without leaving it to ferment.


WATCH Video
Notes
Fermentation Process
Leave to ferment in room temperature for at least a day. Don’t open your bottle of kimchi for the first 24 hours. Note that fermentation time will vary depending on your room temperature. This may take a little over 2 days in colder climates. Fermentation is faster in warmer temperatures. Alternatively, you can slowly ferment the kimchi in the refrigerator. See more fermentation FAQ below.Fermentation gives kimchi the sour taste. As it continues to ferment, the sour taste and smell strengthens, so does the flavour of the kimchi.
Notes and FAQ
- Gochugaru vs. Gochujang – using gochugaru or Korean hot pepper powder is the best and is what is used to make traditional kimchi. I used gochujang, which is the hot pepper powder in paste form and it did not yield the exact same flavours and also had a more orange and slightly brown-ish colour.
- Water – if using gochujang (paste), lessen water to 1/4 cup instead of 1/2 cup.
- Flour – glutinous rice flour is what’s traditionally used. If you don’t have access to it, feel free to use all-purpose flour or regular rice flour, for a gluten-free alternative.
- Salt – seasoning with salt is sometimes unnecessary since the cabbage is soaked in salt water and absorbs the salt over time. It would be best to taste the kimchi first before seasoning with salt. You can always add the salt even a few days after, when flavours start to infuse and strengthen.
- Fermentation and Storage – Fermentation gives kimchi the sour taste. As it continues to ferment, the sour taste and smell strengthens, so does the flavour of the kimchi.
- Top layer of the bottle of kimchi is discoloured/pale orange - the top layer of kimchi that's not completely submerged in the liquid during fermentation can turn into a pale orange and look dry. Don't worry as this is normal from being exposed and not submerged in the liquid. You can just give its good mix after fermentation and it'll be good!
- Too Salty? – if your kimchi becomes too salty after fermenting, you can add more vegetables like sliced carrots, leeks, radish to ‘absorb’ the saltiness. Leave it to sit in the refrigerator and try it again after a few days.
More Fermentation Tips
- Placing in containers – do not fill your bottles or containers to the brim when kimchi is not yet fermented because they’ll expand! Best to fill at most 3/4 of the container.
- Bubbles and Air Pockets – you’ll notice that the kimchi will expand and form bubbles during fermentation. This is a good sign!
- After fermentation – after the kimchi has fermented and you’re happy with how sour it is, place it in the refrigerator to prevent it from going bad. Make sure to mix the kimchi well in its juices so they’re all coated. Compress the kimchi again and pack it tight before sealing the container!
- Kimchi juice – okay so kimchi juice is perfect to use in certain recipes like fried rice and kimchi pancake, because it definitely adds to the colour and the taste. But what if your kimchi doesn’t have too much liquid? I find that squeezing the cabbage too much during the preparation process takes out a lot of its liquid so even after fermentation, it no longer releases so much water to create a lot of juice. So if you want juicy kimchi, you can just wash the cabbage well to remove the salt and not squeeze them too dry before mixing in the paste.
- Storing kimchi – the longest I’ve kept my kimchi in the fridge is 6-8 weeks but it can of course last a long longer. The flavours do get stronger as it sits in the juices longer, so it’s important to take note of that, especially if your kimchi is a bit salty at the start.
NUTRITIONAL INFO

Korean Beansprout Salad
Ingredients
Cooking the Sprouts
- 500 g fresh soy bean sprouts or mung bean sprouts
- 1 tsp salt
- 5 cups water
Seasoning
- 2 tbsp chopped spring onions, scallions, or green onions
- 2-4 tbsp toasted sesame oil (see notes)
- 1 tsp minced garlic
- 2-3 tsp toasted sesame seeds
- 3/4 - 1 tsp salt adjust according to taste
- 2 tsp sugar or more to taste
- 1/4 tsp ground black pepper or more to taste
- 2 tsp gochugaru or Korean chili powder (optional)
Instructions
- Wash the beansprouts in running water. Remove the bad sprouts that float. Drain water then set aside.

- Heat a pot with 5 cups water. Add in the salt. Once it boils, place the beansprouts and leave to cook for 6-7 minutes. Turn off the heat and leave the bean sprouts to cool.
- Strain the water from the beansprouts. Run beansprouts through some cold water. Squeeze out any excess liquid from the sprouts. Note that the sprouts will continue to release liquid especally when it sits in the seasoning so it's best to really squeeze out the excess liquid after it cooks.
- While the beansprouts are cooking, mix the sesame oil, minced garlic, sesame seeds, salt, green onion, pepper, gochugaru (if using) in a large bowl. Feel free to add some sugar, for a hint of sweetness, if you’d like!
- Place the cooked and squeezed beansprouts in the sesame oil mix. Mix well and then taste the bean sprouts. The seasoning is totally up to you and you can always adjust everything to your desired taste by adding more salt and sugar, to taste, as needed. If it's a bit dry you can add more sesame oil and more sesame seeds for extra flavour.

- This can be refrigerated and enjoyed for up to 1 week or even longer. Just make sure to keep it in a cold place in your fridge and only scoop out what you want to consume at a time.Spinach: I also used this same recipe for the spinach salad. But of course I used spinach isntead of the beansprouts.


WATCH Video
Notes
SESAME OIL
I highly recommend to use Korean roasted sesame oil for the best flavour. If your sesame oil doesn't have as strong flavour as Korean sesame oil or if your beansprout salad is a bit dry and lacking in flavour, you can add more sesame oil.NUTRITIONAL INFO
Pin these images:


Hi again Jeeca, I made this kimchi today but I forgot to add the 1/2 cup water into the kimchi paste when blending all the other ingredients, it came out quite thick. Will it affect the fermentation process? I’ve placed them into containers to ferment overnight.
Hi Jeeca, the kimchi turned out well for my 1st time, my whole family loves it 🙂 tq.
If I want to add in an Asian pear or apple for natural fruity sweetness, how do I adjust the recipe? Thanks ??
Hi Kris! Do you mean you’d like to add natural fruity sweetness to the kimchi paste? If that’s the case, you can puree/finely grate the pear and add it to the paste (the gochugaru + flour) and omit the sugar. From there you can adjust the paste to your taste. Hope this helps!
Yeah Jeeca, wanna add some natural sweetness to the kimchi 🙂 will give it a try, thanks for your reply.
Hi jeeca, I prepared the kimchi but looks like the paste is more. I added more carrot and let it ferment. Still paste looks more can I add new cabbage now while it’s fermenting?
Hi Rachael, I recommend you add some salted and squeezed cabbage after it ferments for the first 24-48 hours. I don’t recommend opening the jar between this period.
Hi jeeca, I already opened the bottle and tasted it. But it has become super duper spicy is there a way to fix it now ? Wish I had seen your reply first before opening the jar ;(