Facebook-f Pinterest Instagram Youtube Tiktok
  • HOME
  • COOKBOOKS
    • ‘VEGAN ASIAN’ COOKBOOK
    • FREE BONUS EBOOK
    • ‘VEGAN KITCHEN’ EBOOK (2019)
  • RECIPES & BLOG
    • All Recipes
    • 30 Minute Recipes
    • Salads and Starters
    • Soups and Stews
    • Easy Stir-Fries
    • Rice Recipes
    • Pasta and Noodle Recipes
      • Ramen and Noodle Soups
    • Asian Recipes
      • East Asian
        • Japanese Food
        • Korean Food
        • Chinese Food
      • Southeast Asian
        • Thai Food
        • Filipino Food
        • Vietnamese Food
        • Indonesian Food
      • Fusion
    • Tofu Dishes
    • Dumplings, Buns, and Pies
    • Finger Food
    • Cauliflower Recipes
    • Sauces and Dips
    • Holiday Recipes
  • COOKING ESSENTIALS
  • ABOUT
  • WORK WITH ME
    • Brand Collaborations
    • Food Photography
Menu
  • HOME
  • COOKBOOKS
    • ‘VEGAN ASIAN’ COOKBOOK
    • FREE BONUS EBOOK
    • ‘VEGAN KITCHEN’ EBOOK (2019)
  • RECIPES & BLOG
    • All Recipes
    • 30 Minute Recipes
    • Salads and Starters
    • Soups and Stews
    • Easy Stir-Fries
    • Rice Recipes
    • Pasta and Noodle Recipes
      • Ramen and Noodle Soups
    • Asian Recipes
      • East Asian
        • Japanese Food
        • Korean Food
        • Chinese Food
      • Southeast Asian
        • Thai Food
        • Filipino Food
        • Vietnamese Food
        • Indonesian Food
      • Fusion
    • Tofu Dishes
    • Dumplings, Buns, and Pies
    • Finger Food
    • Cauliflower Recipes
    • Sauces and Dips
    • Holiday Recipes
  • COOKING ESSENTIALS
  • ABOUT
  • WORK WITH ME
    • Brand Collaborations
    • Food Photography
Menu
  • HOME
  • COOKBOOKS
    • ‘VEGAN ASIAN’ COOKBOOK
    • FREE BONUS EBOOK
    • ‘VEGAN KITCHEN’ EBOOK (2019)
  • RECIPES & BLOG
    • All Recipes
    • 30 Minute Recipes
    • Salads and Starters
    • Soups and Stews
    • Easy Stir-Fries
    • Rice Recipes
    • Pasta and Noodle Recipes
      • Ramen and Noodle Soups
    • Asian Recipes
      • East Asian
        • Japanese Food
        • Korean Food
        • Chinese Food
      • Southeast Asian
        • Thai Food
        • Filipino Food
        • Vietnamese Food
        • Indonesian Food
      • Fusion
    • Tofu Dishes
    • Dumplings, Buns, and Pies
    • Finger Food
    • Cauliflower Recipes
    • Sauces and Dips
    • Holiday Recipes
  • COOKING ESSENTIALS
  • ABOUT
  • WORK WITH ME
    • Brand Collaborations
    • Food Photography
  • All Posts
  • All Recipes
    • Salads and Starters
    • Soups and Stews
    • 30 Minute Recipes
    • Easy Stir-Fries
    • Rice Recipes
  • Asian Recipes
    • Southeast Asian
      • Thai Food
      • Filipino Food
      • Vietnamese Food
      • Indonesian Food
    • East Asian
      • Korean Food
      • Japanese Food
      • Chinese Food
    • Fusion
  • Tofu Recipes
    • Favorite Tofu Recipes
  • Pasta and Noodle Recipes
    • Ramen and Noodle Soups
  • Recipe Roundup
  • Sauces and Dips
  • Sides and Snacks
  • Sweets and Desserts
  • More
    • Finger Food
    • Dumplings, Buns, and Pies
    • Savoury Dishes
    • Cauliflower Recipes
    • Holiday Recipes
    • Pantry Recipes
    • Pantry-Friendly Recipes
    • Lifestyle and Travel
Menu
  • All Posts
  • All Recipes
    • Salads and Starters
    • Soups and Stews
    • 30 Minute Recipes
    • Easy Stir-Fries
    • Rice Recipes
  • Asian Recipes
    • Southeast Asian
      • Thai Food
      • Filipino Food
      • Vietnamese Food
      • Indonesian Food
    • East Asian
      • Korean Food
      • Japanese Food
      • Chinese Food
    • Fusion
  • Tofu Recipes
    • Favorite Tofu Recipes
  • Pasta and Noodle Recipes
    • Ramen and Noodle Soups
  • Recipe Roundup
  • Sauces and Dips
  • Sides and Snacks
  • Sweets and Desserts
  • More
    • Finger Food
    • Dumplings, Buns, and Pies
    • Savoury Dishes
    • Cauliflower Recipes
    • Holiday Recipes
    • Pantry Recipes
    • Pantry-Friendly Recipes
    • Lifestyle and Travel
Categories
  • Jeeca Jeeca
  • - June 28, 2020
  • - 2:50 pm

Vegan Japanese Curry Bread Buns (Kare Pan)

📖 TABLE OF CONTENTS show
KARE PAN OR JAPANESE CURRY BUN
THE CURRY FILLING
Japanese Curry Bread Buns (Kare Pan)
Ingredients 1x2x3x
Dough
Dry Ingredients
Wet Ingredients
Filling
Japanese Curry
‘Egg wash’ and coating
Instructions
Cooking the Curry:
Making the Dough:
Making the Wrappers and Buns:
‘Egg’ Wash and Coating:
Cooking/Baking:
STORAGE AND REHEATING:
WATCH Video
Notes
NUTRITIONAL INFO
Pin these images:

Sharing is caring!

  • Facebook
  • Twitter
Jump to Recipe Jump to Video

I’ve always loved Japanese curry and how savoury and rich it is. I’ve enjoyed my fair share of Japanese curry, lots of it actually, and in different forms.

KARE PAN OR JAPANESE CURRY BUN

I love it the classic way with some steamed rice, in the form of curry udon, omurice curry, and this version, which is as a filling for bread!

I remember trying Kare Pan or Curry Bread Buns years back during a trip to Japan when I still wasn’t vegan and fell in love.

I found these in many different parts of Japan. From 7/11 outlets in Tokyo to small bakeries in Kyoto.

Check out the recipe video on how to make these Vegan Kare Pan or Japanese Curry Bread Buns below!

They all had slightly different takes on kare pan, but one thing remained the same: there was a crispy coating of bread crumbs.

The bread itself was really so crisp on the outside but with a good chewy bite on the inside, followed by a deliciously rich and savoury curry.

THE CURRY FILLING

For the filling, I used my favourite vegan Japanese curry cubes and added in some potatoes, carrots, bell peppers, and onions.

It’s totally up to you what you want to mix in (you can also add in some mushrooms or tofu!) but I love a simple veggie mix.

You can also enjoy your leftover curry with some crispy Tofu Katsu!


You’ll find the full recipe and steps below! You can also watch the video. Enjoy!

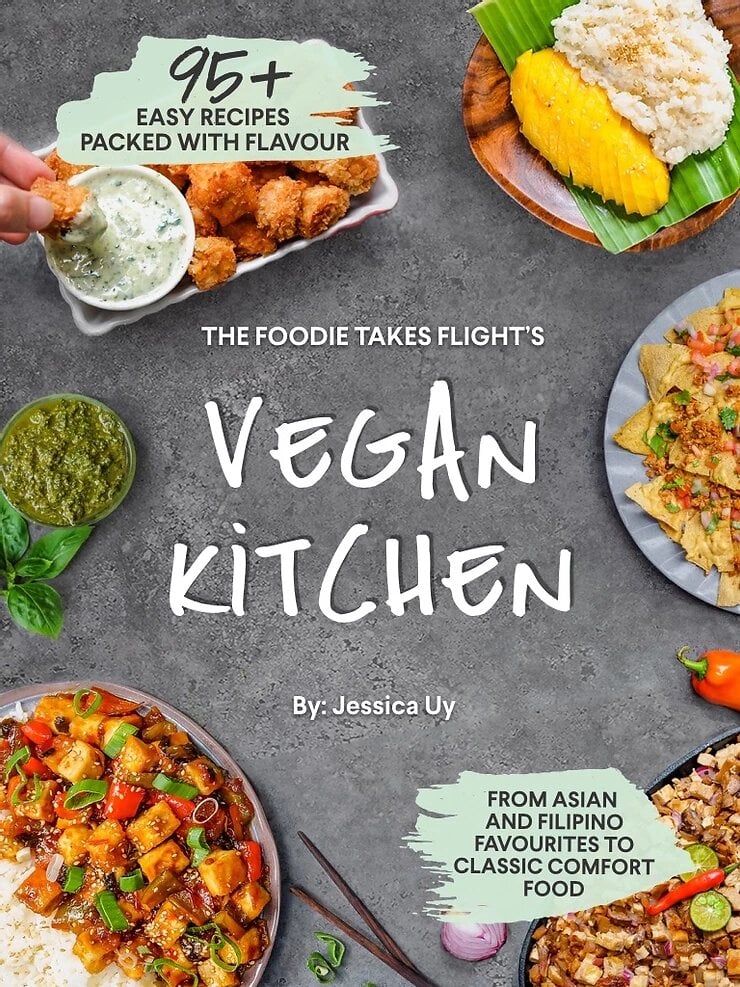
Are you looking for more delicious, vegan recipes? Check out my latest Vegan Kitchen eBook, that has over 95 recipes (and a whole section for Asian recipes!) that are packed with flavour and made with simple and easily accessible ingredients! Also, two trees (instead of 1!) will be planted for every download of my eBook through non-profit organisation One Tree Planted.?

Find out more about my reforestation initiatives here.

If you make this recipe, please tag me on my Facebook or Instagram and use the hashtag #thefoodietakesflight 🙂 

Japanese Curry Bread Buns (Kare Pan)

Jeeca
5 from 1 vote
Crispy on the outside with a light and chewy dough on the inside! Filled with satisfying savoury Japanese curry with potatoes, carrots, onions, and bell peppers—but you can get creative with your veggies (or even tofu) of choice! These are usually cooked by frying to a golden brown crisp, but can also be baked!
Print Recipe Pin this Recipe Rate this Recipe
Prep Time 30 minutes mins
Cook Time 30 minutes mins
Dough Resting Time 1 hour hr
Total Time 2 hours hrs
Course Appetizer, Side Dish, Snack
Cuisine Japanese
Servings 8 buns
Calories 164 kcal

Ingredients
  

Dough

Dry Ingredients

  • 1 cup (155g) bread flour
  • 1/4 cup (40g) all-purpose flour
  • 1 tbsp (9g) corn starch
  • 1 tsp salt
  • 1 tbsp sugar
  • 1 tsp instant dry yeast

Wet Ingredients

  • 1/2 cup warm soy milk or other non-dairy milk
  • 1 tbsp neutral oil sunflower, canola, vegetable, etc.

Filling

  • 1 1/2 cup cooled japanese curry for filling recipe follows

Japanese Curry

  • 2 cups diced potatoes* see notes
  • 1 cup diced carrots* see notes
  • 1 onion diced*
  • 1 bell pepper diced
  • 2 cups water or more depending on desired consistency
  • 70-80 g vegan Japanese curry cubes make sure they don’t contain any animal-derived ingredients, adjust depending on desired thickness and richness
  • Neutral oil for cooking

‘Egg wash’ and coating

  • 2 tbsp room temperature soy milk mixed with 1/2 tbsp corn starch
  • 1/2 to 3/4 cup japanese or panko breadcrumbs or more as needed for coating

Instructions
 

Cooking the Curry:

  • Heat a large pan or pot over medium high. Add some oil. Once hot, add in the onions and sauté until tender. Place the bell peppers and cook for a few minutes. Add in the carrots and potatoes. Pour in the water and the curry cubes.
  • Mix well and then cover to leave to a boil. Mix every 5 minutes or so. The sauce will slowly start to thicken. You’ll want a thick sauce for the filling so you can set aside some to cool. For the rest, you can opt to water it down and enjoy with some rice and Crispy Tofu Katsu.
  • Leave the curry to cool. I refrigerated mine overnight for a really thick consistency to use as filling for the buns.

Making the Dough:

  • Mix all the dry ingredients together in a large bowl. While mixing, add in the warm milk. Mix until you have small pieces of dough and then feel free to mix with your hands to well combine. Add in the oil and them mix well. Keep kneading for 8-10 minutes, making sure to scrape the flour from the sides of the bowl, until you have a smooth ball of dough that no longer sticks to your hands.
  • Shape the dough into a ball. Place back into the bowl and then cover with a damp towel. Leave to sit in a warm area or in the oven and leave on a ‘proof’ setting for at least 1 hour or until the dough has doubled in size.
  • Once the dough has doubled, you can also check by punching a small hole with your finger. If it doesn’t bounce back, your dough is ready!

Making the Wrappers and Buns:

  • Divide the dough into half. Roll out 2 logs and then divide each one into 4 to get 8 pieces in total. Each piece will be around 40-45 grams.
  • Keep the dough covered with a damp towel to avoid them from drying while you work on each piece.
  • Roll a piece of dough into a ball and then lightly flatten on a floured surface. With a rolling pin or small dumpling rolling pin (which I used), roll the dough until you have a round wrapper that’s around 3.5 to 4” in diameter. Repeat this for the rest of the dough.
  • Pinch the sides of each wrapper to thin out. See video for a better idea. From here, each wrapper will be around 4 to 4.5” in diameter.
  • Scoops 1 to 1.5 tbsp of filling into the center of the wrapper, avoiding the sides. It’s important not to get curry sauce in the sides of the wrapper since it’ll get messy and it’ll be harder to seal the buns.
  • Grab the edges of the wrapper and seal tight around the edges by pinching together. Lightly tuck in the sides to seal again, making sure the filling doesn’t seep out.
  • Repeat this for the rest of the wrappers until you have 8 buns. The buns will continue to rise, especially if in warmer temperatures, so keep an eye out for possible expansion and seals that might open up! You can just pinch these together in case.

‘Egg’ Wash and Coating:

  • Mix the cornstarch and milk together until the starch has diluted to make your ‘egg’ wash. Make sure to mix this well before brushing since the cornstarch and sit at the bottom.
  • Place the bread crumbs in a plate or shallow bowl.
  • Brush a bun with the the egg wash throughout all the sides then place it onto the breadcrumbs. Pat the breadcrumbs onto the bun to coat evenly. Repeat this step for the rest.

Cooking/Baking:

  • If baking, heat your oven to 350F and prepare a lined baking tray. Brush the tray with some oil and place the buns. Spray or sprinkle the buns with a bit of oil.
  • Leave to bake for 35-40 minutes or until lightly brown and crisp, flipping halfway through (if buns don’t open up).
  • If frying, heat a large pan or pot over high heat. Place enough oil to submerge at least half of the buns. Test the heat by adding some breadcrumbs. If it bubbles, the oil is hot enough.
  • Place the a few buns into the oil. The number of buns will depend on the size of your pan or pot. Leave to cook for around 5 minutes on each side or until golden brown. Keep at eye out that they don’t burn!
  • Flip over and cook for the other side.
  • NOTE, if your buns open up during the frying process and the curry seeps out, immediately take it out of the oil and place it on a baking tray. You can bake it for the rest of the cooking time. I baked mine in an oven toaster for around 15 minutes, depending on how cooked it was upon removing from the oil.
  • Drain out excess oil from the fried buns and enjoy while hot!

STORAGE AND REHEATING:

  • You can refrigerate the buns for up to 1 week and reheat on an oven toaster until hot and crisp.

WATCH Video

Notes

Veggies: I sliced my potatoes and carrots into small 0.5” cubes. You can also opt to use other vegetables of choice and even add in some tofu and mushrooms if you’d like!

NUTRITIONAL INFO

Serving: 1piece | Calories: 164kcal | Carbohydrates: 18g | Protein: 3g | Fat: 9g | Saturated Fat: 1g | Polyunsaturated Fat: 3g | Monounsaturated Fat: 6g | Trans Fat: 1g | Sodium: 295mg | Potassium: 71mg | Fiber: 1g | Sugar: 3g | Vitamin A: 466IU | Vitamin C: 20mg | Calcium: 9mg | Iron: 1mg
DID YOU MAKE THIS RECIPE?Please leave a rating or comment and share a photo on Instagram, and tag me @thefoodietakesflight or use #thefoodietakesflight 🙂

Pin these images:

This Post Has 4 Comments

  1. fegen March 17, 2021 Reply

    5 stars
    This was amazing! Left out the bell peppers and added edamame. Was a hit in my household 🙂

    1. Jeeca March 18, 2021 Reply

      Thank you so much and happy you guys enjoyed these! 🙂

  2. Celine December 15, 2021 Reply

    Thank you for the recipe! I want to make these for my boyfriends birthday and need to freeze them. Is it possible to freeze these before frying?

    1. Jeeca December 26, 2021 Reply

      Hi Celine, I haven’t tried freezing these before cooking but I think they should be fine. Just make sure to space them well on a tray before freezing so they don’t stick to one another. Then I recommend to fry these directly from frozen, no need to thaw. ◡̈

5 from 1 vote

Leave a Reply Cancel reply

Recipe Rating


The Foodie Takes Flight Photo

Hello there!

I’m Jeeca, a food content creator and recipe developer passionate about creating easy yet tasty and flavour-packed vegan recipes. I share a lot of Asian recipes inspired by my travels and those I grew up enjoying.

​ MORE ABOUT TFTF >

MY COOKBOOK

Vegan Asian Cookbook

Subscribe for recipes and updates

Search for a recipe:

Search
PrevCrispy Vegetable and Mushroom Spring Rolls (Vegan Recipe)
Korean Gochujang Cauliflower (Vegan Recipe)Next

Latest Recipes

silken tofu topped with shallot garlic oil, crispy shallots, sliced scallions, chili oil, and sesame seeds

Cold Tofu with Shallot Garlic Oil

GET THE RECIPE »
A bowl of shallot oil noodles topped with crispy fried shallots, scallions, and sesame seeds

10-Minute Shallot Oil Noodles with Crispy Shallots

GET THE RECIPE »
Golden brown crispy fried shallots in a bowl

How to Make Crispy Fried Shallots

GET THE RECIPE »
Crispy golden tofu cubes coated in a glossy soy citrus glaze, served with rice and garnished with fried curry leaves.

Crispy Tofu with Soy Citrus Glaze

GET THE RECIPE »
Pita bread topped with lettuce, tomato, crispy tofu, mushrooms, and a spoonful of pesto mayo

Zesty Tofu and Mushroom Wraps with Pesto Mayo

GET THE RECIPE »
Ultimate vegan udon guide and recipes

Ultimate Vegan Udon Guide & Recipes

GET THE RECIPE »
Page1 Page2 Page3 … Page10
Search
TFTF ICON LOGO 2021

RECIPES

SHOP MY ESSENTIALS

ABOUT

COOKBOOKS

FOLLOW ME ON SOCIAL MEDIA:

Youtube Facebook Instagram Pinterest Tiktok

PRIVACY POLICY

Rate This Recipe

Your vote:


A rating is required
A name is required
An email is required

Recipe Ratings without Comment

Something went wrong. Please try again.