In time for the upcoming holiday festivities and Christmas celebrations, I thought I'd share a vegan version (that's super close to the real thing) of my favourite food growing up: Lumpiang Shanghai! These are Filipino Spring Rolls that are a lot thinner and usually smaller than Chinese egg rolls.
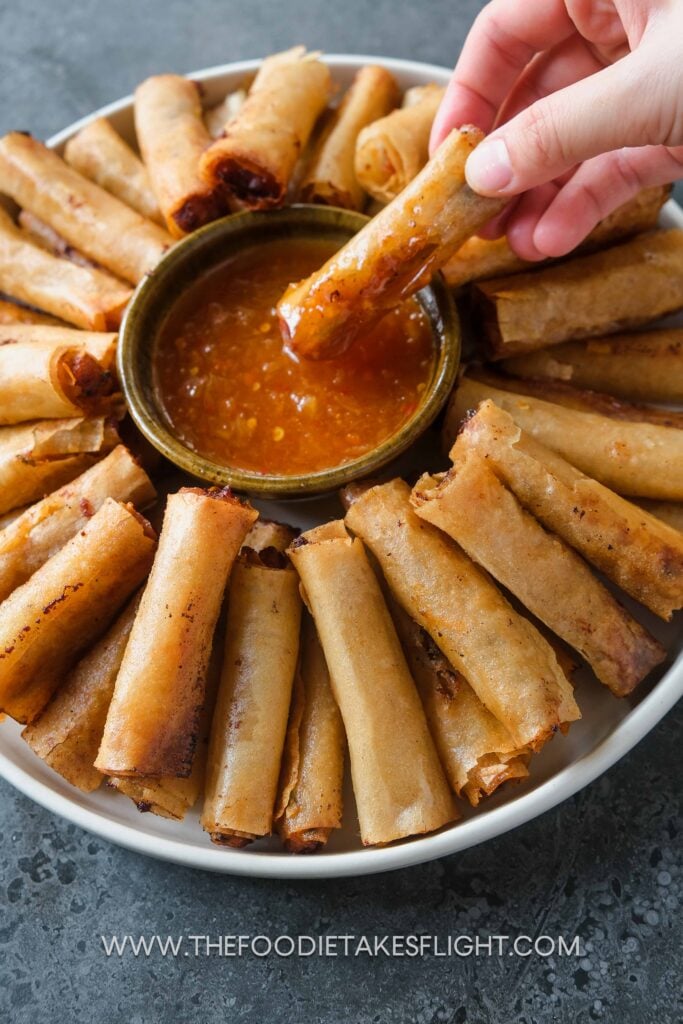
Crispy on the outside with a meaty filling, these Vegan Lumpiang Shanghai is my vegan take on Filipino spring rolls! These are delicious finger food or snack, that’s perfect for sharing. These are best enjoyed with a sweet chili sauce, banana ketchup, or other sauce of choice.

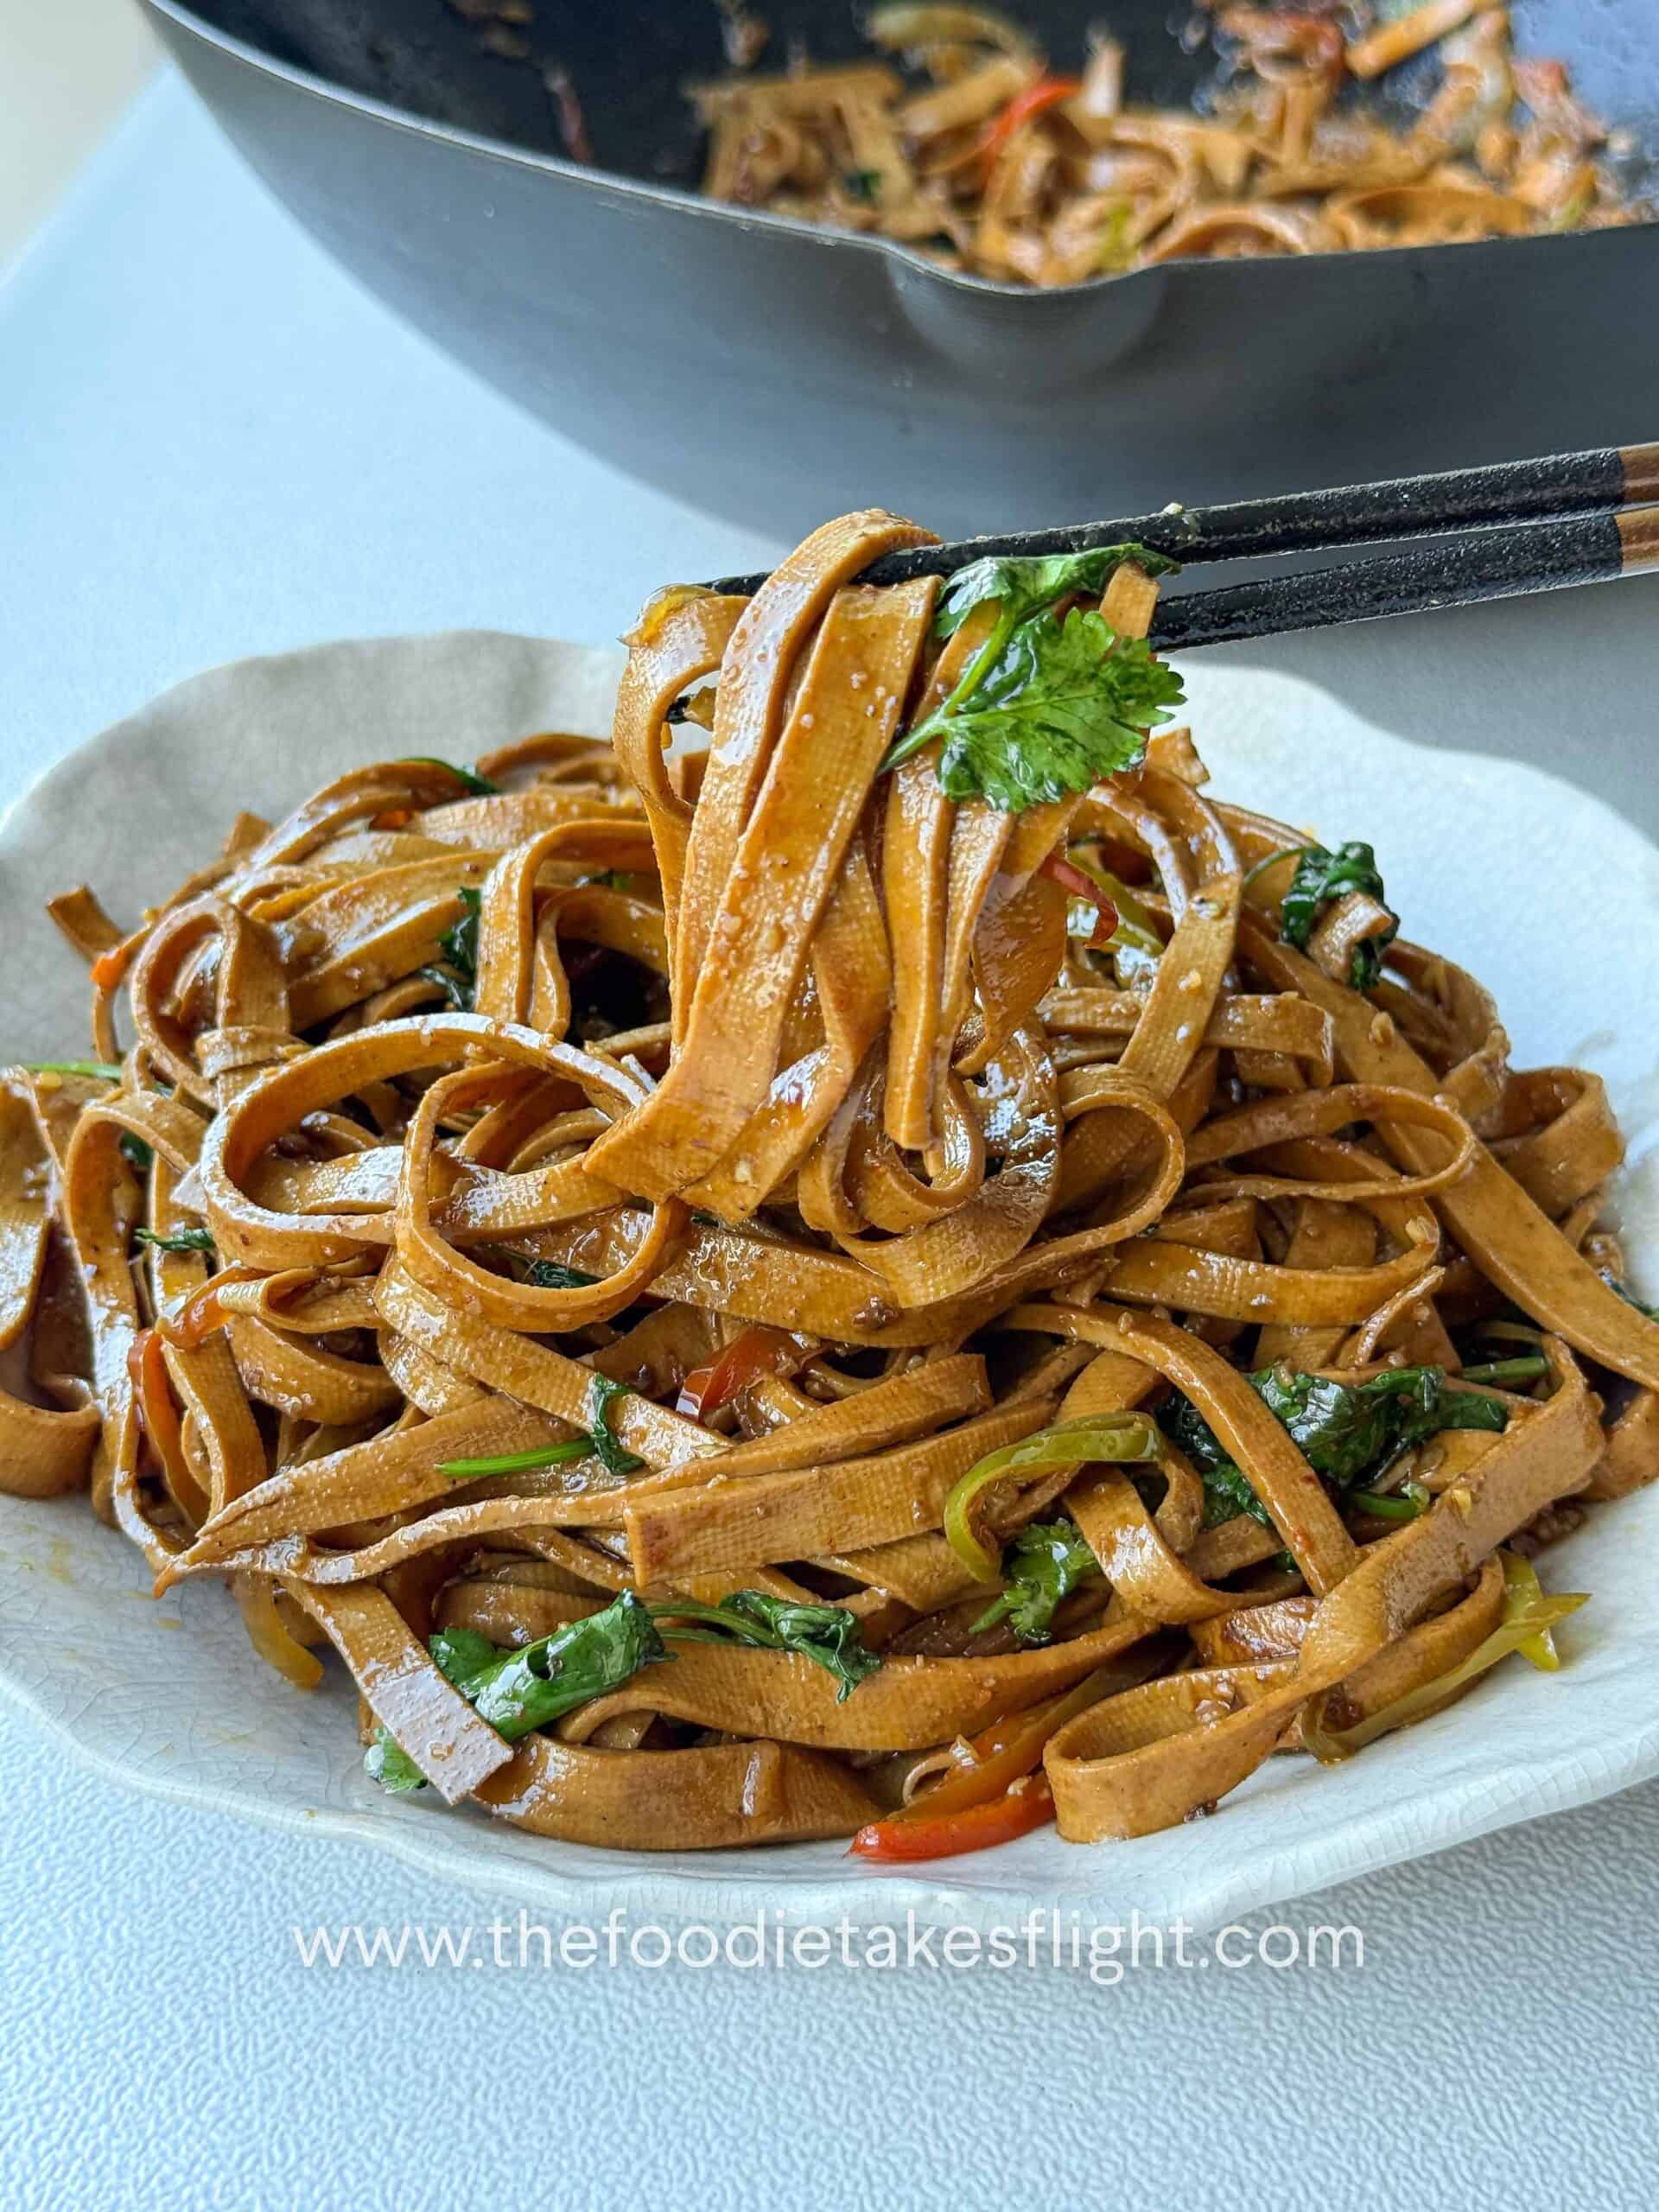
This version of lumpiang shanghai uses plant-based ground/meat alternative. If you're looking to make one with a mix of tofu and vegetables, you can check out my other Lumpiang shanghai recipe here (see photo above for that version!).
LUMPIANG SHANGHAI OR FILIPINO SPRING ROLLS
Here in the Philippines we have a famous dish called Lumpiang Shanghai that’s basically fried spring rolls (lumpia) in a ‘Shanghai’ style as we call it because of Chinese influence in the past.
WHAT IS LUMPIA USUALLY MADE OF?
Lumpiang Shanghai is traditionally made with ground pork.
This is of course vegan so I made this without the usual ground pork, of course! Lumpiang Shanghai is commonly filled with meat and some vegetables but for these spring rolls, I've made two versions - one with some tofu mince to go with mixed veggies an the other with a plant-based ground 'pork' alternative.


OTHER TYPES OF LUMPIA
Lumpia is the general term meaning 'spring roll' in Filipino used for any form of spring roll. An 'ng' is added at the end of lumpia when it's used to describe a type of lumpia. So in this case there's lumpiang shanghai. There is also lumpiang gulay, or a vegetable spring rolls (gulay = vegetable), lumpiang ubod or sariwa that's made with a mix of vegetables and ubod or hearts of palm and usually wrapped in a freshly made wrapper and not fried.
SPRING ROLL/LUMPIA WRAPPERS
If using frozen wrappers, make sure to thaw them well at room temperature so they’re easy to work with.
The wrappers I purchase are labelled ‘lumpia wrappers’. These are usually very thin yet pliable. These are different from egg roll wrappers and are thinner but if you’re only able to find egg roll wrappers, then those are okay too. I usually go to the freezer or chiller section of my local grocery to buy lumpia wrappers.
IMPORTANT NOTES FOR THE WRAPPERS:
- Make sure your wrappers are thawed at room temperature (if from frozen). You’ll want your wrappers to settle down at room temperature so they are easier to separate and are much more pliable. If you use wrappers that have not been compiled thawed at room temperature, these can be hard to separate and be stiff/dry. If so, they can break apart easily. So it’d really be best to defrost your wrappers (if frozen) the day before by placing it in the fridge and leave it out in room temperature a few hours before using.
- Also make sure your wrappers are sealed or covered with a towel to prevent them from drying out when exposed to air.

There are also fresh lumpia wrappers (see photo below) that you can get freshly made from the market/palengke if you live in the Philippines or in other Asian countries that have spring rolls and make wrappers from scratch!

THE LUMPIANG SHANGHAI OR SPRING ROLL FILLING
- plant based ground meat , I used Omnipork mince
- carrot, peeled and finely grated
- onion, finely diced/chopped
- scallions, chopped
- sugar
- soy sauce or liquid seasoning or to taste
- garlic powder or minced garlic
- fresh ground pepper

FOR EASIER FILLING DISTRIBUTION
For an easier and more even distribution of filling, I placed my filling in a resealable plastic bag (alternatively you can use an icing bag) and cut the bottom edge to create a hole.

- You can watch the video or see the photos above to see how I filled and wrapped these.
- For an easier and more even distribution of filling, I placed my filling in a resealable plastic bag (alternatively you can use an icing bag) and cut the bottom edge to create a hole.
- From there, I laid out 3-6 wrappers on a flat surface and then squeezed out the filling on the bottom part of each wrapper.
- Roll from the bottom to the top, and carefully press down on the filling to make sure it’s compressed well and there are no holes or air bubbles.
- Brush the top of the wrapper with more water to seal the roll. Repeat this for the rest.

- After rolling, I cut each lumpia into 2 3-inch pieces each. So I had a total of 48 halves. I used a pair of scissors to cut these.
- Note: the number of rolls you'll be able to make will depend on the size of your wrappers. If you use larger wrappers you can possibly but the roll into 2-3 pieces or even more.
- Traditionally, we leave the filling of the lumpia exposed on the sides. This is how Filipino lumpiang shanghai usually is and I find that this only works if you’re using plant-based ground because this holds up well, like real meat.
- Also see storage tips below for making these ahead!

COOKING THE SPRING ROLLS
- Heat a deep frying pan with oil enough to submerge at least half of the spring rolls. Once the oil is hot and you see small bubbles, place some lumpia. These should immediately sizzleOnce hot, place a few rolls.
- Cook over medium heat. Flip after a few minutes to cook the other side. Once golden brown throughout, remove from the oil. Shake out any oil then leave on a strainer to drain excess oil. Make sure not to cover your freshly cooked lumpia to make sure they don’t sog.

HOW TO SERVE AND ENJOY YOUR LUMPIANG SHANGHAI OR FILIPINO SPRING ROLLS
- Let cool for a few minutes and slice into half, if desired. Enjoy while hot and dip in your favourite dipping sauce! I love mine with some bottled sweet chili sauce or banana ketchup.
- These are perfect as finger food during a party or family gathering. These are also perfect as a starter, side, snack, or even as a main with rice.

HOW TO STORE LUMPIANG SHANGHAI
CAN I FREEZE LUMPIANG SHANGHAI? The short answer is YES!
For uncooked rolls: You can store uncooked spring rolls in the freezer. I keep mine in an air-tight container and freeze them.
It's also helpful to add some wax paper or plastic to divide the spring rolls per layer so you can pull out a few at a time, especially if you're not cooking these all at the same time.
It's best to consume your frozen lumpiang shanghai within 1-2 months.


MORE FILIPINO RECIPES YOU MIGHT LOVE:

Vegan Lumpiang Shanghai (Filipino Spring Rolls)
Ingredients
- 17.5 oz plant based ground meat , I used Omnipork mince
- 1 small carrot peeled and finely grated
- 1 small onion finely diced/chopped
- 2 scallions chopped
- 2 tsp sugar
- 2-3 tsp soy sauce or liquid seasoning or to taste (see notes)
- 1 tsp garlic powder or minced garlic
- Fresh ground pepper
- 24 pieces spring roll or lumpia wrappers mine were 6x6” thawed at room temp (see notes)
- Small bowl of water for wrapping
- Neutral oil for frying (see notes for baking)
Instructions
Lumpia or Spring Roll Wrappers
- Make sure your wrappers are thawed at room temperature (if from frozen). You’ll want your wrappers to settle down at room temperature so they are easier to separate and are much more pliable. If you use wrappers that have not been compiled thawed at room temperature, these can be hard to separate and be stiff/dry. If so, they can break apart easily. So it’d really be best to defrost your wrappers (if frozen) the day before by placing it in the fridge and leave it out in room temperature a few hours before using.
- Also make sure your wrappers are sealed or covered with a towel to prevent them from drying out when exposed to air.
“Meat” Filling
- Make sure your plant based ground is completely thawed. Mix all the ingredients in a large bowl. Feel free to adjust everything to your taste. Do note that some plant-based ground brands already have seasoning so you may need to cut down on the soy sauce/liquid seasoning. I actually taste my plant based ground to be sure.
Rolling the Lumpiang Shanghai
- You can watch the video or see the photos above to see how I filled and wrapped these.
- For an easier and more even distribution of filling, I placed my filling in a resealable plastic bag (alternatively you can use an icing bag) and cut the bottom edge to create a hole.
- From there, I laid out 3-6 wrappers on a flat surface and then squeezed out the filling on the bottom part of each wrapper.
- Roll from the bottom to the top, and carefully press down on the filling to make sure it’s compressed well and there are no holes or air bubbles.
- Brush the top of the wrapper with more water to seal the roll. Repeat this for the rest.
- After rolling, I cut each lumpia into 2 3-inch pieces each. So I had a total of 48 halves. I used a pair of scissors to cut these.Note: the number of rolls you'll be able to make will depend on the size of your wrappers. If you use larger wrappers you can possibly but the roll into 2-3 pieces or even more.
- Traditionally, we leave the filling of the lumpia exposed on the sides. This is how Filipino lumpiang shanghai usually is and I find that this only works if you’re using plant-based ground because this holds up well, like real meat.
- Also see storage tips below for making these ahead!
Cooking the Lumpiang Shanghai
- Heat a deep frying pan with oil enough to submerge at least half of the spring rolls. Once the oil is hot and you see small bubbles, place some lumpia. These should immediately sizzleOnce hot, place a few rolls.
- Cook over medium heat. Flip after a few minutes to cook the other side. Once golden brown throughout, remove from the oil. Shake out any oil then leave on a strainer to drain excess oil. Make sure not to cover your freshly cooked lumpia to make sure they don’t sog.
- Let cool for a few minutes and slice into half, if desired. Enjoy while hot and dip in your favourite dipping sauce! I love mine with some bottled sweet chili sauce or banana ketchup.
How to Enjoy Lumpiang Shanghai
- These are perfect as finger food during a party or family gathering. These are also perfect as a starter, side, snack, or even as a main with rice.
How to Store Lumpiang Shanghai
- For uncooked rolls: You can store uncooked spring rolls in the freezer. I keep mine in an air-tight container and freeze them. It's also helpful to add some wax paper or plastic to divide the spring rolls per layer so you can pull out a few at a time, especially if you're not cooking these all at the same time. Best to use within 1-2 months.
- For cooked rolls: Make sure the rolls are cooled completely. Store them in a container/bag as well.
- To cook frozen spring rolls: No need to thaw. Cook directly from frozen. This works for both the cooked or uncooked ones. For the cooked rolls, you can simple reheat these on a pan or in the oven until crispy.
WATCH Video
Notes
BAKING
- These are best when fried to create a golden brown and super crisp exterior but you can also bake them by brushing the rolls with some oil before leaving them in the oven for 40 minutes at 400F, flipping halfway through.
WRAPPERS
- Note: the number of rolls you'll be able to make will depend on the size of your wrappers. If you use larger wrappers you can possibly but the roll into 2-3 pieces or even more.
- The wrappers I purchase are labelled ‘lumpia wrappers’. These are usually very thin yet pliable. These are different from egg roll wrappers and are thinner but if you’re only able to find egg roll wrappers, then those are okay too. I usually go to the freezer or chiller section of my local grocery to buy lumpia wrappers.
PLANT BASED GROUND 'PORK'
- Feel free to adjust everything to your taste. Do note that some plant-based ground brands already have seasoning so you may need to cut down on the soy sauce/liquid seasoning. I actually taste my plant based ground to be sure.
- I used Knorr liquid seasoning to season mine.
NUTRITIONAL INFO
You can pin this image:

Yupiiii! Finally, I found it, but I will do it with pork, so, would I have to sauté it with the vegetables before rolling them? Here, I don’t think I’ll find vegetable pork meat, I only find soy meat, which is especially for one of my daughters who is a fish vegan. Any recommendation?. Thanks in advance. Kisses from Spain
Hi Maria! If you do this with ground pork, no need to sauté it first. We use ground meat and season it and use that raw as the filling since it will cook down when frying. If you want to try out the filling to be sure it’s seasoned well before rolling it all in the lumpia you can microwave a small portion of the filling and try it out. If using soy meat, that works too. You may just need a binder like corn starch to bind it since some soy meat can be very dry. Hope this helps ◡̈
Amazing!!!used pvt seasoned with liquid smoke and mushroom broth instead of the meat and it was a hit with everyone! Thank you for the great recipe 🙂
Yaaay, thank you Di! ◡̈